SSC/Morris 5 plate Jap clutch installation with GP/DL chaincase cover
- Soak clutch corks overnight in favorite Lambretta gearbox oil
- Remove right,rear floor board, exhaust, chaincase cover and stock clutch unit
- Clean SSC/Morris clutch parts in paraffin, brake cleaner or whatever you use to clean your parts. Blow dry using compressed air
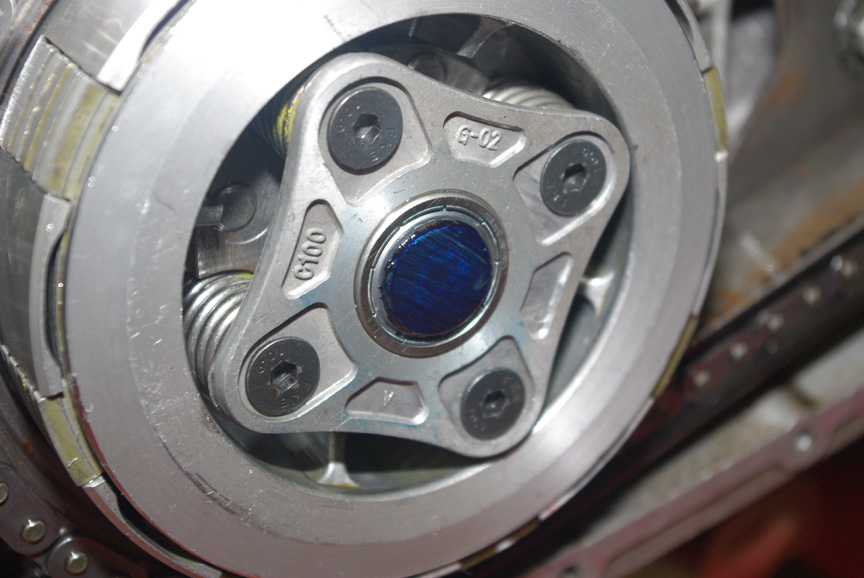
- Add a smear of oil to bronze bush in crown wheel. Install new crown wheel and assemble clutch cartridge alternating between plates and steels.
- Install cartridge. Make sure that splined teeth are properly aligned and add washer and torque center nut in steps. First to 25 ft/lbs and finish it at 59 ft/lbs
- Install springs and pressure plate. Tighten in cross pattern a small amount at a time until fully seated. Torque allen heads to 9 ft/lbs
- Adjust chain tension
Now here's where it gets tricky. The SSC/Morris clutch is slightly taller than the stock Lambretta clutch and it interferes with the chaincase cover. You have 2 options to resolve this. You can either shim the chaincase cover out using 4 or more chaincase cover gaskets or you can follow these simple instructions to alter your stock chaincase cover so that it will not interfere and you only need 1 gasket.
The first thing you need to do is smear a thin and even layer of prussian blue/dykem or a thick and darkly colored grease to the pressure plate. The purpose of this is to mark exactly where the clutch is interfering with the chaincase cover.
You'll first want to identify where on the case it interferes so remove the bronze plunger and clutch actuator from the cover. Once you have done that, install the chaincase cover onto the more WITHOUT the chaincase cover gasket. The point of this is to create enough clearance without the gasket so that when the gasket is used, it will add just a touch more clearance just to be sure everything works correctly. Fasten the cover on the right and left sides only as you'll be taking this on and off a number of times so keep it quick.
Remove the cover and look for the blue marks around the edge of the housing that retains the bronze plunger.
Using a small sanding pad attached to a drill or dremel, carefully sand down the housing a little bit. Install the cover and remove it. Look for the blue marks and if they exist, sand it a little bit more. Continue doing this until you have no more interference marks on the cover. You may need to add some more dykem to the pressure plate as you go.
Once you have the chaincase cover clearance properly machined, you'll now need to do the same with the brass plunger. Your going to remove a lot of material from this piece so an old used one will probably be the easiest but a new one will also be fine.
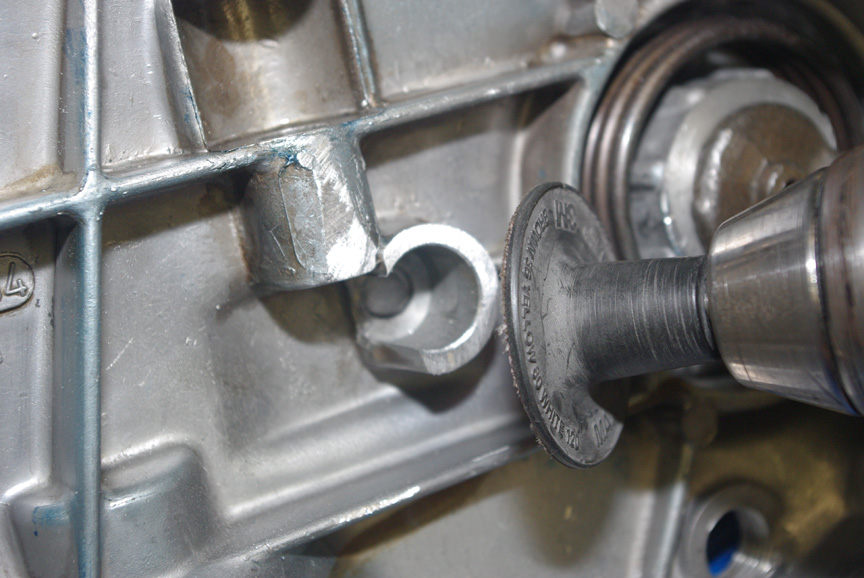
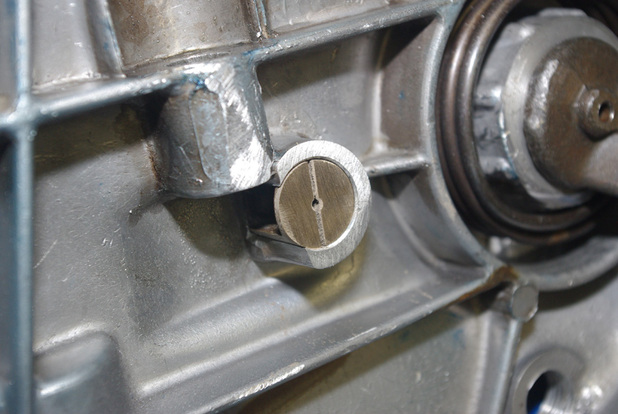
Re-install the clutch arm and actuator foot. Install the brass plunger and note how much of the plunger face is protruding from the edge of the housing.
This will give you a general idea of how much you will need to remove. There is not a lot of reason to test fit the cover onto the motor until the plunger face is at least sitting flush with the housing.
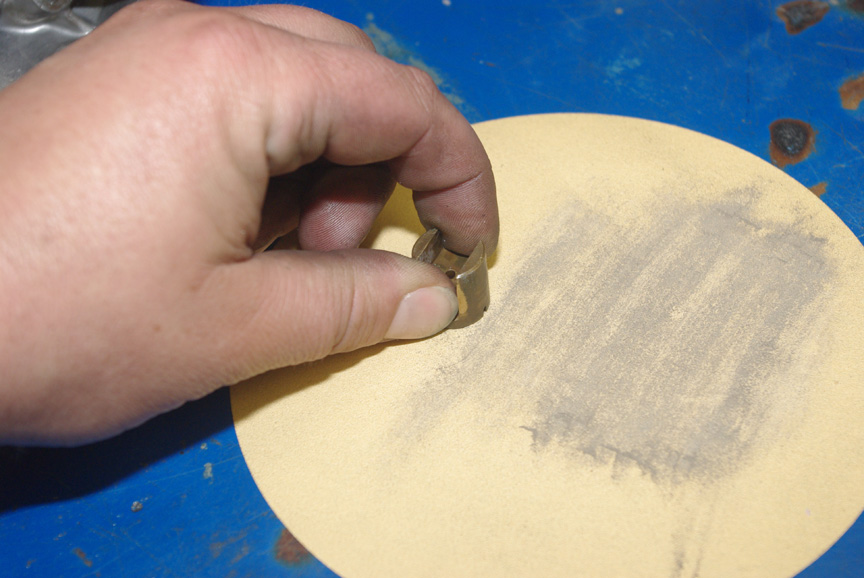
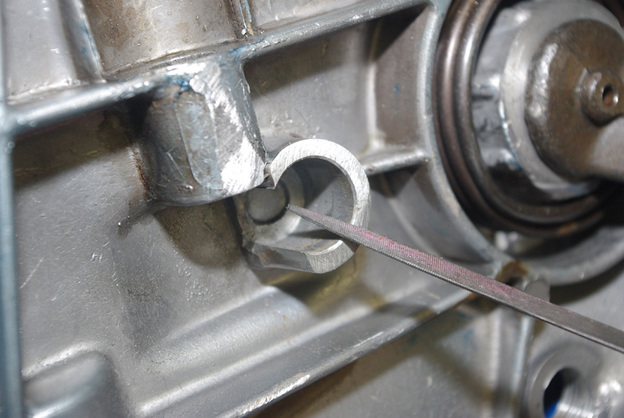
Tape a piece of 220 grit sandpaper so a flat surface. Carefully begin sanding the face of the plunger. It is extremely important that this be sanded straight so slow strokes and even pressure are the key.
Alternate between sanding and test fitting until the plunger sits flush with the lowest part of the edge.
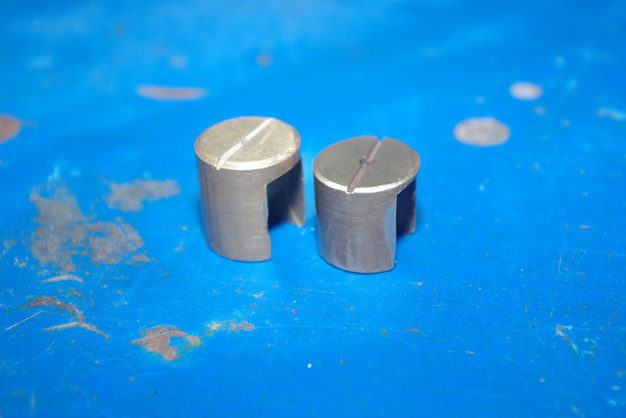
Here is a modified plunger sitting next to a new plunger. You can see how much shorter you will have to make the plunger so that it does not rub on the clutch.
Using the same method of fitting/removing the chaincase cover, you will now determine what is still rubbing after you have modified the plunger.
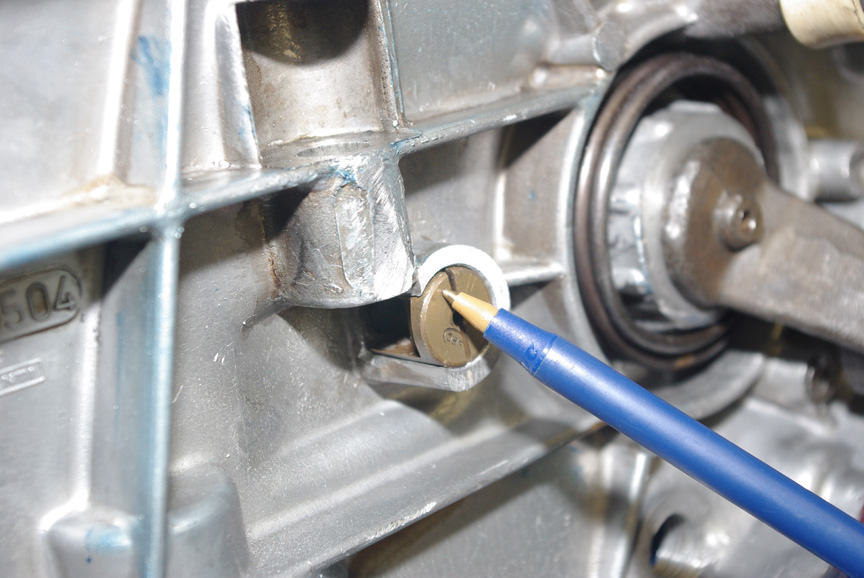
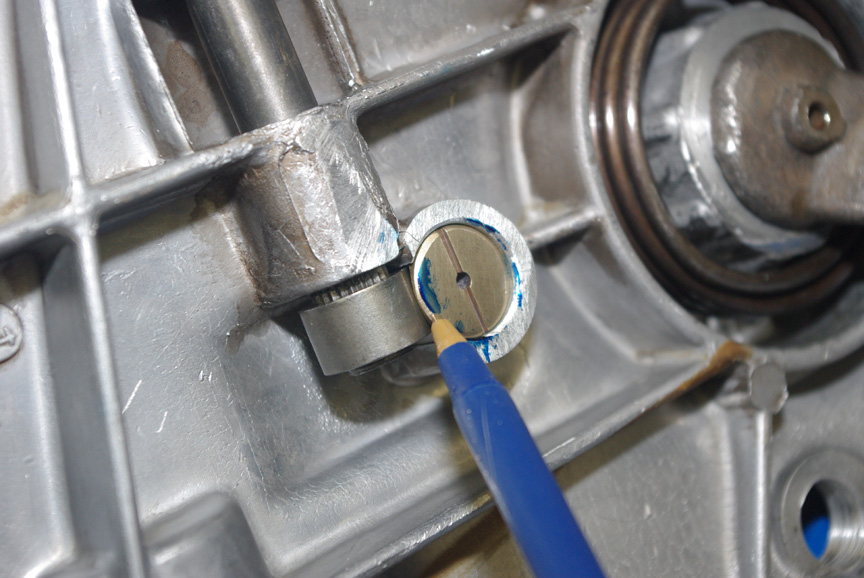
Here you can see the dykem identifying interference between the clutch and the chaincase cover and brass plunger. If this happens, resume sanding and test fitting until it no longer interferes.
Here you can see the dykem identifying interference between the clutch and the chaincase cover and brass plunger. If this happens, resume sanding and test fitting until it no longer interferes.
Once you are satisfied with the fitment, use a small file to bevel the edges of the brass plunger and plunger housing on the chaincase. If you needed to sand past the oil slit on the face of the plunger, you will need to file a new one as this is important for lubrication.
Once have completed the modifications, clean the chaincase cover and parts with parts cleaner and blow them out with compressed air. Install the chaincase cover with gasket and torque nuts in criss cross pattern to 3.8 ft/lbs. Re-install the exhaust and rear right floorboard. Add gear lube, re-adjust clutch cable and enjoy.
